This is a draft and it is incomplete
Simple Chat App With React And Rails
23 Jan 2023
Introduction
This is a tutorial post on how to set up a Rails and React Chat project using Websockets with Action Cable.
Assumptions
You have Ruby, Bundler, and Rails installed. You have Node installed.
Steps
- Project generation and setup
- Test connection between rails api and react app
1. Project Generation and Setup
1) Create a folder to hold both your rails and react app and initialize git.
cd /into/the/folder/you/want
mkidr simple-chat-app-rails-react
cd simple-chat-app-rails-react
git init
2) Generate your rails project in API mode and delete default git configuration.
rails new --api sc-rails
rm -rf ./sc-rails/.git
3) Generate react app and delete default git configuration
npx create-react-app sc-react
rm -rf ./sc-react/.git
4) Setup gitignore and Commit your changes
git add .
git commit -m 'First commit: generated rails and react template projects'
2. Test connection between rails api and react app
1) Setup your initial root route for rails using generation
cd sc-rails
bin/rails g controller home index
2) Modify your config/routes.rb file to look like this:
# config/routes.rb
Rails.application.routes.draw do
  root "home#index"
  get 'home/index'
end
3) Make sure your HomeController#index action looks like this:
# app/controllers/home_controller.rb
class HomeController < ApplicationController
  def index
    render json: { status: 'ok' }
  end
end
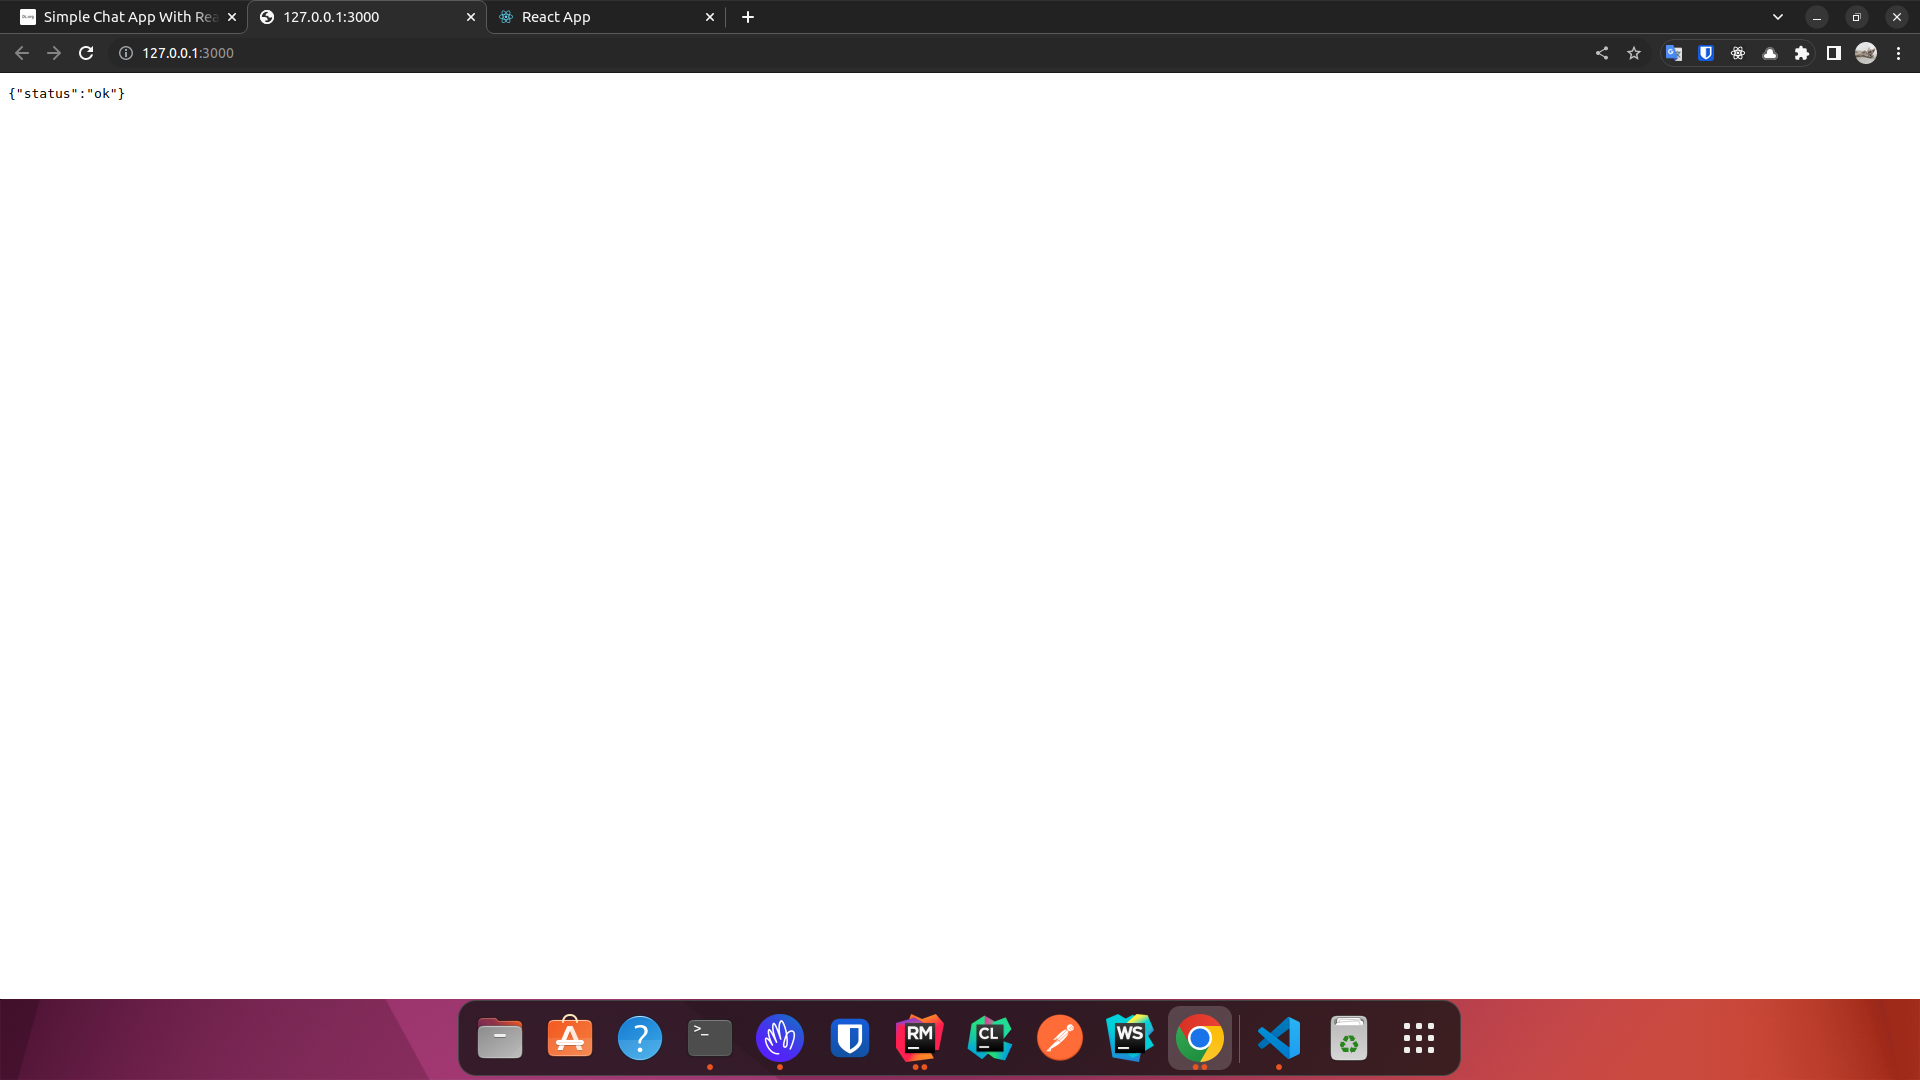
4) Now if you run your rails server like so:
bin/rails server
You should see something like this:
5) Now let’s commit our work.
git add .
git commit -m "Created rails root route"
6) Now let us set up the React side of things by first installing react-query and axios.
cd sc-react
npm i react-query axios